Expo Go and Expo Dev Client are not the Same
Rajan Gautam
Mon Mar 03 2025
Preface— Similar to many others, I am a complete beginner in Expo and React Native. I faced challenges while setting up the development client, as the official documentation proved less helpful. However, through experimentation and tinkering, I successfully navigated the process and fully configured it for development.
💡 Note: Expo Go and Expo Dev Client are not the same. Make sure you know which one you want to set up.
So, Let’s Get Started!
The following tutorial is tailored for Windows machines, specifically Windows 10 (64-bit). If you’re using a Mac or Linux, feel free to read through to grasp the overall process.
Contents —
- Install Java Development Kit (JDK)
- Setup Environment Variables : JAVA_HOME & JAVA Path
- Download Android Studio
- Configure SDK & Build Tools
- Configure Android Emulator
- Configure Android Environment Variables : ANDROID_HOME & Path
- Install NodeJS
- Setup Expo Project
- Setup Expo Dev Client & Compile Expo Project Locally
- Create Your First Debug-Development Build
What is Expo Dev Client ?
According to the official Expo documentation, opting for development builds instead of Expo Go grants you complete control over the native runtime. This allows you to install any native libraries, adjust project configurations, or even write your own native code.
In simpler terms, the default Expo configuration involves uploading the project to the Expo cloud and then receiving the build. However, this process seamlessly supports only Expo libraries. If you’re working with native libraries, such as @react-native-google-signin/google-signin, it doesn’t operate in the same manner.
Setting up Expo Dev Client: A Step-by-Step Guide
For this tutorial, you will need the JAVA Development Kit (JDK), Android Studio, and Node.
Step 1 : Install Java Development Kit (JDK)
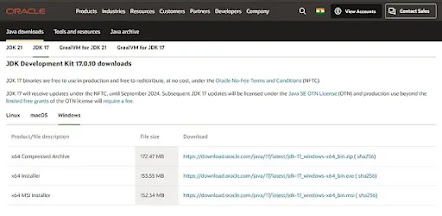
Visit Oracle or OpenJDK Platform to download JDK, ensuring compatibility with your Gradle version. As of 2024, React Native is using Gradle 8.3, which is compatible with JDK 17.
Follow the installation guide and note the path where you are installing JAVA by default it is C:\Program Files\Java\jdk-17
Step 2 : Setup Environment Variables : JAVA_HOME and JAVA Path
Search for ‘Environment Variables’ in the system properties. Within this section, you will find variables for your user account and system. It’s advisable to set variables for both.
Follow these steps:
- Create a new variable in both system and user variables with the name ‘JAVA_HOME,’ and input the path where you installed your JDK
(e.g., C:\Program Files\Java\jdk-17). - Locate the ‘Path’ variable under system variables. Add the path to your ‘jdk/bin’ folder (e.g., C:\Program Files\Java\jdk-17\bin).
Finally, to verify the setup, run ‘java - -version’ in the command prompt (cmd). If set up correctly, you should see the Java version information.

